DOM
문서 객체 모델(DOM, Document Object Model)은 XML이나 HTML 문서에 접근하기 위한 일종의 인터페이스이다.
이 객체 모델은 문서 내의 모든 요소를 정의하고, 각각의 요소에 접근하는 방법을 제공한다.
Document 객체
1. Document 객체
Document 객체는 웹 페이지 그 자체를 의미하며, 브라우저가 해당 문서에 접근을 가능할 수 있게 만든 객체이다.
웹 페이지에 존재하는 HTML 요소에 접근하고자 할 때는 반드시 Document 객체부터 시작해야 한다.
2. HTML 요소의 선택
| 메소드 | 설명 |
| document.getElementsByTagName(태그이름) | 해당 태그 이름의 요소를 모두 선택함. |
| document.getElementById(아이디) | 해당 아이디의 요소를 선택함. |
| document.getElementsByClassName(클래스이름) | 해당 클래스에 속한 요소를 모두 선택함. |
| document.getElementsByName(name속성값) | 해당 name 속성값을 가지는 요소를 모두 선택함. |
| document.querySelectorAll(선택자) | 해당 선택자로 선택되는 요소를 모두 선택함. |
3. HTML 요소의 생성
| 메소드 | 설명 |
| document.createElement(HTML요소) | 지정된 HTML 요소를 생성함. |
| document.write(텍스트) | HTML 출력 스트림을 통해 텍스트를 출력함. |
4. HTML 이벤트 핸들러 추가
| 메소드 | 설명 |
| document.getElementById(아이디).onclick = function(){ 실행할 코드 } | 마우스 클릭 이벤트와 연결될 이벤트 핸들러 코드를 추가함. |
property
1. 객체 프로퍼티(property)
모든 자바스크립트 객체는 Object 객체와 Object.prototype 객체의 모든 프로퍼티를 상속받는다.
prototype 프로퍼티를 이용하면 현재 존재하는 프로토타입에 새로운 프로퍼티나 메소드를 손쉽게 추가할 수 있다.
2. 객체 메소드(method)
모든 자바스크립트 객체는 Object 객체와 Object.prototype 객체의 모든 프로퍼티와 메소드를 상속받는다.
*자주 사용되는 객체 메소드
| 메소드 | 설명 |
| hasOwnProperty() | 특정 프로퍼티가 해당 객체에 존재하는지를 검사한다. 해당 객체에서 직접 선언된 프로퍼티만을 검사하며, 같은 이름의 프로퍼티라도 상속받은 프로퍼티는 false 값을 반환한다. |
| propertyIsEnumerable() | 특정 프로퍼티가 해당 객체에 존재하고, 열거할 수 있는 프로퍼티인지를 검사한다. 즉, 이 메소드는 hasOwnProperty() 메소드의 결과가 true이면서, 동시에 열거할 수 있는 프로퍼티인지를 검사한다. |
| isPrototypeOf() | 특정 객체의 프로토타입 체인에 현재 객체가 존재하는지를 검사한다. |
| isExtensible() | 객체에 새로운 프로퍼티를 추가할 수 있는지 여부를 반환한다. |
| toString() | 이 메소드를 호출한 객체의 값을 문자열로 반환한다. |
| valueOf() | 특정 객체의 원시 타입(primitive type)의 값을 반환한다. 자바스크립트에서는 원시 타입의 값이 기대되는 곳에 객체가 사용되면, 내부적으로 이 메소드를 호출하여 처리한다. |
객체
1. 객체 생성
let myObj = {};
let yourObj = new Object();
2. 객체 프로퍼티 설정
myObj.name = "둘리";
myObj["age"] = 33; // 프로퍼티 이름 - 동적인 연산가능, 문자열 합연산
3. 객체 콘솔 출력
let myObj = {};
myObj.name = "둘리";
myObj.age = 20;
console.log(myObj); // {name: '둘리', age: 20};
4. 리터럴 표기를 이용한 객체의 생성
<!DOCTYPE html>
<html lang="ko">
<head>
    <title>Page Title</title>
</head>
<body></body>
<script>
    let myPerson = {
        name: "또치",
        age: 44,
    };
    console.log(myPerson);
</script>
</html>
5. 객체에 메소드 추가
<!DOCTYPE html>
<html lang="ko">
<head>
    <title>Page Title</title>
</head>
<body></body>
<script>
    let myObj = {
        name: "길동",
        age: 55,

        sayHello: function() {
            console.log("안녕하세요");
        }
    }
    myObj.sayHello();
</script>
</html>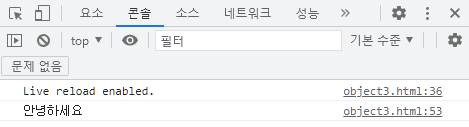
프로토타입(prototype)
1. prototype
자바스크립트의 모든 객체는 프로토타입(prototype)이라는 객체를 가지고 있다.
모든 객체는 그들의 프로토타입으로부터 프로퍼티와 메소드를 상속받는다.
이처럼 자바스크립트의 모든 객체는 최소한 하나 이상의 다른 객체로부터 상속을 받으며, 이때 상속되는 정보를 제공하는 객체를 프로토타입(prototype)이라고 한다.
<!DOCTYPE html>
<html lang="ko">
<head>
    <meta charset="UTF-8">
    <title>Page Title</title>
</head>
<body></body>
<script>
    function Human(name, age) {
        this.name = name;
        this.age = age;

        this.hello = function () {
            console.log("Hello. I'm " + this.name);
        };
    }
    let h1 = new Human("둘리", 15);
    let h2 = new Human("희동", 4);

    h1.hello();
    h2.hello();
</script>
</html>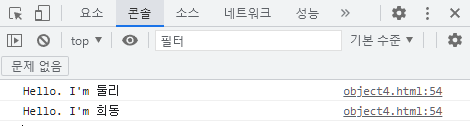
2. prototype 프로퍼티
prototype 프로퍼티를 이용하면 현재 존재하고 있는 프로토타입에 새로운 프로퍼티나 메소드를 손쉽게 추가할 수 있습니다.
| 공통 property 정의 | prototype 프로퍼티 이용 | obj1.printValue = function() { console.log(this.value); } |
| 개별 property 정의 | 객체 참조하여 함수 정의 | MyObj.prototype.sameFunc = function() { console.log(this.value); } |
<script>
    class MyObj {
        value = "문자열값";
    }

    let obj1 = new MyObj();
    let obj2 = new MyObj();

    obj1.printValue = function() {
        console.log(this.value);
    }

    obj1.printValue(); // 문자열값

    MyObj.prototype.sameFunc = function() {
        console.log(this.value);
    }

    obj1.sameFunc(); // 문자열값
    obj2.sameFunc(); // 문자열값
</script>
class
<!DOCTYPE html>
<html>
<head>
    <meta charset='utf-8'>
    <title>Page Title</title>
</head>
<body></body>
<script>
    class Person {
        #name;
        #age;

        constructor(name, age) {
            this.#name = name;
            this.#age = age;
        }

        toString() {
            return "사람이름: " + this.#name + ", 사람나이: " + this.#age;
        }

        valueOf() { // 기본형
            return this.#age;
        }

        printAll() {
            console.log(this.name, this.age);
        }
    }

    let p1 = new Person("사람1", 44);
    let p2 = new Person("사람2", 56);

    p1.printAll();
    p2.printAll();

    console.log(p1.name);
    console.log(p1.age);
    console.log(p1.toString());
    console.log(p1 + "문자열 연산 시에는 toString이 호출됩니다.");
    console.log(p1.valueOf());

    console.log(p2.name);
    console.log(p2.toString());
</script>
</html>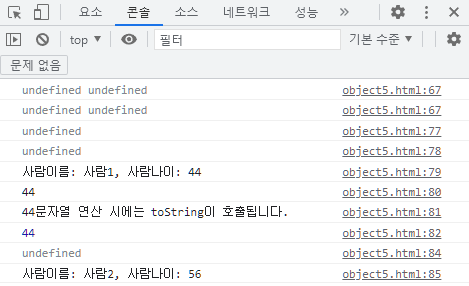
Private Property
private한 필드 설정을 위해 앞에 #을 붙여준다.
#필드;
`${}`
백틱(`)으로 문자열을 정의하는 방법이다.
${} 문법을 이용해 문자열에 변수 또는 식을 넣을 수 있다.
toString() {
    return `사람이름: ${this.#name}, 사람나이: ${this.#age}`;
}
get(프로퍼티 접근)
class Person {
	#name;
	...
	get name() {
		return this.#name;
	}
}
...
let p1 = new Person("사람1");
console.log(p1.name); // 사람1
set(프로퍼티 값 설정)
class Person {
	#name;
	...
	set name(name) {
		this.#name = name;
	}
}
...
let p1 = new Person("사람1");
p1.name = "새이름";
console.log(p1.name); // 새이름
this
자바스크립트의 경우 Java와 같이 this에 바인딩되는 객체는 한가지로 고정되는게 아니라
해당 함수 호출 방식에 따라 this에 바인딩되는 객체가 동적으로 달라진다.
this는 기본적으로 window 이다.
일반 함수 내에서 혼자 this를 선언하면, 그 this는 window객체를 가르킨다.
객체 메서드 내에서 this를 선언하면, 그 this는 객체를 가리킨다.
화살표 함수 안에서 this를 사용하면, 외부에서 this 값을 가져온다.
<!DOCTYPE html>
<head>
    <meta charset="UTF-8">
    <title>Document</title>
</head>
<body>

</body>
<script>

    globalThis.name = "윈도우"; // var 변수는 호이스팅이 일어나면서 window 컨텍스트에 만들어진다.
    // globalThis랑 window가 같다.
    // var asdf;
    // window.asdf;
    // globalThis.asdf;

    let obj = {
        name: "객체"
    }

    // 호이스팅된 함수들은 자기참조로 윈도우가 된다.
    let myfunc = function someFunction() {
        console.log("myfunc: " + this.name);
    }

    function hoisted() {
        console.log("hoisted: " + this.name); // this는 윈도우 객체 참조가 일어난다.
    }

    obj.fun1 = myfunc;
    obj.fun2 = hoisted;

    obj.fun1(); // 객체
    obj.fun2(); // 객체

    myfunc(); // 윈도우

    let binding = hoisted.bind(obj);
    binding(); // 객체


    // apply랑 call같음 호출해줌
    hoisted.apply(obj); // 객체
    hoisted.call(obj); // 객체

    let arrow = () => console.log("arrow: " + this.name); // this는 밖에서 빌려와서 window 불변
    arrow(); // 윈도우

    obj.fun3 = arrow;
    obj.fun3(); // 객체 아님??? -> 윈도우

    let another = {
        name: "다른객체",
        funAnother: () => console.log("another: " + this.name),
    }
    another.funAnother(); // 다른 객체 아님?? -> 윈도우

    class MyClass {
        name = "클래스안 name";
        ClassMethod = () => console.log("MyClass: " + this.name)
    }
    let obj3 = new MyClass();
    obj3.ClassMethod(); // 클래스안 name
</script>
</html>
함수 스코프
함수 스코프는 함수에서 정의한 블록문만 스코프의 유효 범위로 인정하는 방식이다.
결국 함수 내부는 지역 스코프, 함수 외부는 전역 스코프 영역이 된다.
<script>
    let localVar = 3;
    let globalVar = "시작시 초기화";
    function myFunc() {
        let localVar = 10;
        globalVar = "전역";
        console.log(localVar);
        console.log(globalVar);
    }
    console.log(globalVar); // 시작시 초기화
    myFunc(); // 10 전역
    console.log(localVar); // 3
    console.log(globalVar); // 전역
</script>
시작시 초기화
10
전역
3
전역
화살표 함수(arrow function)
1. 화살표 함수
화살표 함수(Arrow function)는 function 키워드 대신 화살표(=>)를 사용하여 보다 간략한 방법으로 함수를 선언할 수 있다.
*형식
let sum = (a, b) => a + b;
let sum = (a, b) => {
	return a + b;
}
*예제
<script>
  let arrowFunc = (x) => {
        console.log(x);
        console.log("파라미터 x를 출력하는 함수입니다.");
   };
   arrowFunc("전달값");

   let sum = (a, b) => a + b;
   let result = sum(100, 200);
   console.log(result);
</script>
전달값
arrow.html:51 파라미터 x를 출력하는 함수입니다.
arrow.html:58 300
2. 화살표 함수가 일반 함수와 다른점
*this를 가지지 않는다. (상위 외부 함수에서 this 가져옴)
*arguments를 지원하지 않는다.
*new와 함께 호출할 수 없다.
*이벤트 메소드에 콜백함수로 쓰면 안된다.
*화살표 함수는 super가 없다.
3. 화살표 함수 사용 제약
(1) 메소드 정의
화살표 함수로 메소드를 정의하는 것은 피해야 한다.
(2) prototype 메소드
화살표 함수로 정의된 메소드를 prototype에 할당하는 경우도 동일한 문제가 발생한다.
prototype에 메소드를 할당하는 경우, 일반 함수를 할당한다.
(3) new 생성자 함수
화살표 함수는 생성자 함수로 사용할 수 없다.
생성자 함수는 prototype 프로퍼티를 가지며 prototype 프로퍼티가 가리키는 프로토타입 객체의 constructor를 사용한다.
하지만 화살표 함수는 prototype 프로퍼티를 가지고 있지 않다.
(4) addEventListener 함수의 콜백 함수
addEventListener 함수의 콜백 함수를 화살표 함수로 정의하면 this가 상위 컨택스트인 전역 객체 window를 가리키게 된다.
따라서 addEventListener 함수의 콜백 함수 내에서 this를 사용하는 경우, function 키워드로 정의한 일반 함수를 사용하여야 한다. 일반 함수로 정의된 addEventListener 함수의 콜백 함수 내부의 thisVisit Website는 이벤트 리스너에 바인딩된 요소(currentTarget)를 가리킨다.
(5) 화살표 함수는 call, apply, bind 메소드를 사용하여 this를 변경할 수 없다.
4. 예제
<!DOCTYPE html>
<html lang="ko">
  <head>
    <meta charset="UTF-8" />
    <title>Document</title>
  </head>
  <body></body>
  <script>
    window.someValue = "전역";
    let obj = {
        someValue: "객체의 프로퍼티"
    }

    let normalFunc = function () {
      console.log("해당 Context의 값 출력합니다. " + this.someValue);
    };
    let arrowFunc = () => {
      console.log("해당 Context의 값 출력합니다. " + this.someValue); // lexical scope. no binding
    };
    normalFunc();
    arrowFunc();
    obj.myFunc = normalFunc;
    obj.myFunc();
  </script>
</html>
arrow2.html:53 해당 Context의 값 출력합니다. 전역
arrow2.html:56 해당 Context의 값 출력합니다. 전역
arrow2.html:53 해당 Context의 값 출력합니다. 객체의 프로퍼티+) lexical scope. no binding
- 바인딩 : 함수 또는 메소드를 호출한 대상에 실제 함수를 연결해주는 것
- 렉시컬 스코프(Lexical Scope) : 어디서 호출하는지가 아니라 어디에 선언하는지에 따라 상위 스코프가 결정되는 스코프
클로저(Closure)
클로저는 외부함수(포함하고 있는)의 변수에 접근할 수 있는 내부 함수를 일컫는다. 스코프 체인(scope chain)으로 표현되기도 한다.
클로저는 세가지 스코프 체인을 가집니다. 클로저 자신에 대한 접근(자신의 블럭내에 정의된 변수), 외부 함수의 변수에 대한 접근, 그리고 전역 변수에 대한 접근. 이렇게 3단계로 구분할 수 있다.
내부 함수는 외부 함수의 변수뿐만 아니라 파라미터에도 접근할 수 있다. 단, 내부 함수는 외부 함수의 arguments 객체를 호출할 수는 없다. (하지만, 외부 함수의 파라미터는 직접 호출할 수 있다.)
<!DOCTYPE html>
<html lang="ko">
  <head>
    <meta charset="UTF-8" />
    <title>Document</title>
  </head>
  <body></body>
  <script>
    function makeCounter() { // closure
        let count = 0;

        function increase() {
            count++;
        }

        return function() {
            increase();
            return count;
        }
    }

    let counter = makeCounter();
    console.log(counter()); // 1
    console.log(counter()); // 2
    console.log(counter()); // 3
  </script>
</html>
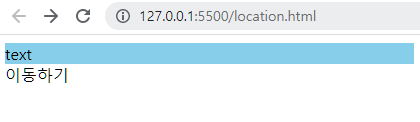
이벤트처리
*click
<!DOCTYPE html>
<html lang="ko">
<head>
<meta charset="UTF-8">
<title>Document</title>
</head>
<body>
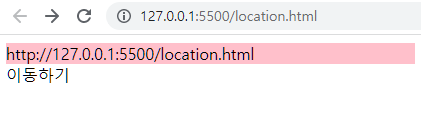
<div id="myDiv" style="background-color: skyblue;">text</div>
<div id="moveTo">이동하기</div>
</body>
<script>
let myDiv = document.getElementById("myDiv");
myDiv.addEventListener("click", function (e) {
console.log("이벤트 발생 확인");
myDiv.style.backgroundColor = "pink";
myDiv.innerText = "새로운 텍스트";
myDiv.innerText = window.location.href;
});
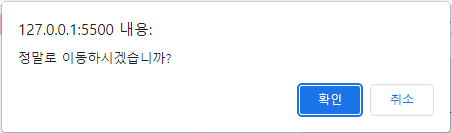
let moveTo = document.querySelector("#moveTo");
moveTo.addEventListener("click", function (e) {
if (confirm("정말로 이동하시겠습니까?")) {
window.location.href = "https://www.naver.com";
}
});
</script>
</html>
*change, keydown
<!DOCTYPE html>
<head>
<meta charset="UTF-8">
<title>Document</title>
</head>
<body>
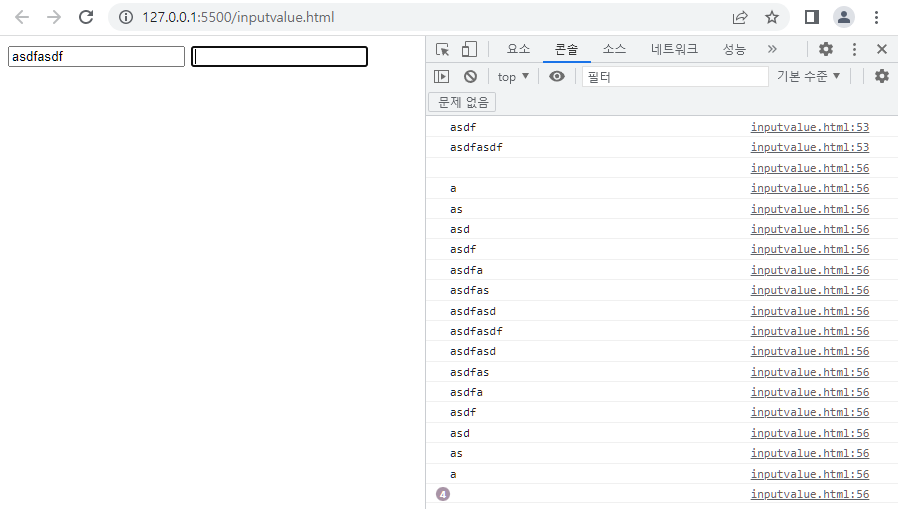
<input id="myText1"/>
<input id="myText2"/>
</body>
<script>
let myText1 = document.getElementById("myText1");
let myText2 = document.getElementById("myText2");
myText1.addEventListener("change", function(e) {
console.log(myText1.value);
})
myText2.addEventListener("keydown", function(e) {
console.log(e.target.value);
})
</script>
</html>
이벤트 취소
preventDefault() 메서드를 사용하면 태그에 기본으로 연결된 이벤트를 취소할 수 있다.
예를 들어, type이 submit인 input 태그의 경우, submit이 되지 않게 설정할 수 있다.
노드 관리
*자식요소 추가
<!DOCTYPE html>
<head>
<meta charset="UTF-8">
<title>Document</title>
</head>
<body>
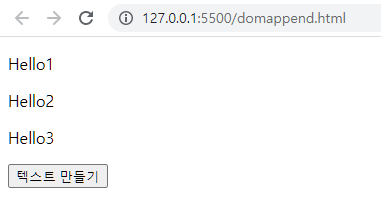
<div id="container"></div>
<button id="btnCreate">텍스트 만들기</button>
</body>
<script>
let btn = document.getElementById("btnCreate");
let container = document.getElementById("container");
let num = 1;
btn.addEventListener("click", function (e) {
let myNewP = document.createElement("p");
myNewP.innerText = "Hello" + num;
num++;
container.append(myNewP);
// container.prepend(myNewP); // 반대
});
</script>
</html>| append | 맨 끝 삽입 |
| prepend | 맨 앞 삽입 |
| before | 이전 삽입 |
| after | 다음 삽입 |
| remove | 해당 요소 삭제 |
외부 스크립트 방법
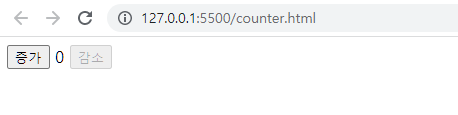
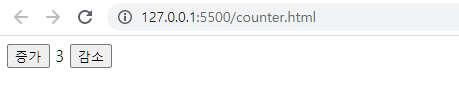
*counter.html
<!DOCTYPE html>
<html>
<head>
    <meta charset='utf-8'>
    <title>Page Title</title>
    <script src="counter.js"></script>
</head>
<body>
    <div id="counter">
        <button id="btn-inc">증가</button>
        <span id="number-span">0</span>
        <button id="btn-dec">감소</button>
    </div>
</body>
</html>
*counter.js
class Counter {
  #num;
  #btnInc;
  #btnDec;
  #numberSpan;

  constructor(num, btnInc, btnDec, numberSpan) {
    this.#num = num;
    this.#btnInc = btnInc;
    this.#btnDec = btnDec;
    this.#numberSpan = numberSpan;

    this.checkDisable();
  }

  checkDisable() {
    if (this.#num === 0) {
      this.#btnDec.disabled = true;
    } else {
      this.#btnDec.disabled = false;
    }
  }

  increase() {
    this.#num++;
    this.checkDisable();
  }

  decrease() {
    if (this.#num > 0) {
      this.#num--;
    }
    this.checkDisable();
  }

  start() {
    this.#numberSpan.innerText = this.#num;

    this.#btnInc.addEventListener("click", (e) => {
      this.increase();
      this.#numberSpan.innerText = this.#num;
    });

    this.#btnDec.addEventListener("click", (e) => {
      this.decrease();
      this.#numberSpan.innerText = this.#num;
    });
  }
}

window.addEventListener("load", function (e) {
    let btnInc = document.getElementById("btn-inc");
    let numberSpan = document.getElementById("number-span");
    let btnDec = document.getElementById("btn-dec");

    let counter = new Counter(0, btnInc, btnDec, numberSpan);
    counter.start();
});


